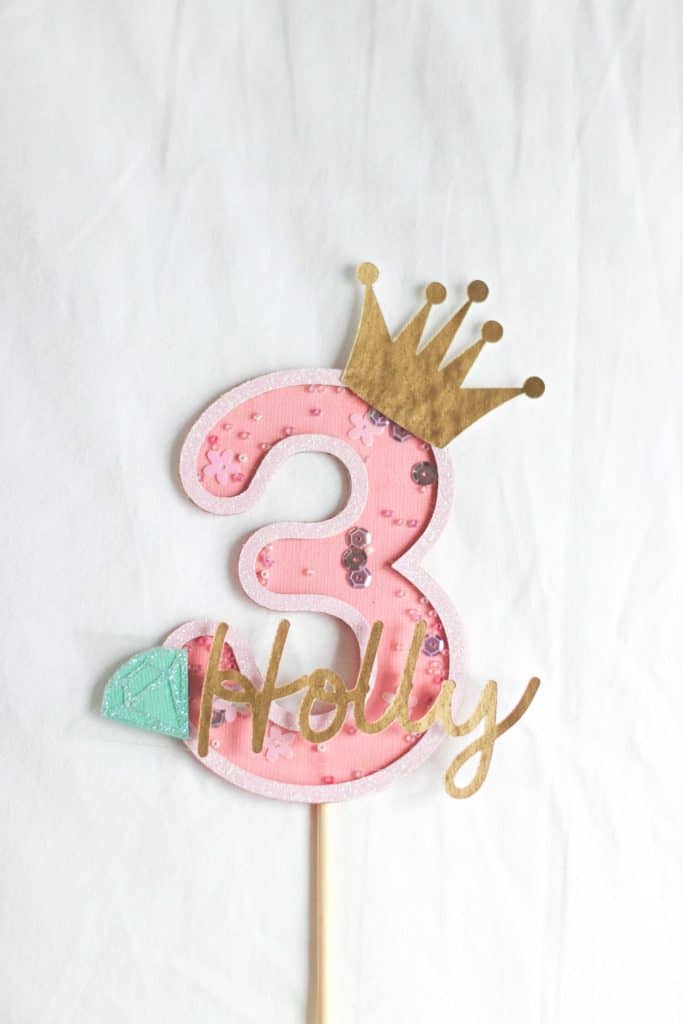
In this shaker cake topper tutorial I hope to give you lots of tips and tricks to get going with your very own show stopping cake decor!
What are shaker cake toppers? They are popular cake decorations which typically consist of a hollow shape that is filled with small decorative elements (like sequins, beads or glitter). Parts of the shape are clear (using acetate or acrylic), creating a little window so that when you shake the cake topper, the decorative elements can be seen moving around inside.
Shaker cake toppers can be used for special occasions such as birthdays, weddings, baby showers, and other celebrations. They are a fun and unique way to add some extra sparkle and excitement to a cake. They definitely make a statement, and they are also so much fun to make!
Shaker cake toppers also make wonderful keepsakes. After they have been used on a cake they can be stuck into a scrapbook or placed in a keepsake box.

How is a shaker cake topper constructed
The key to a good shaker cake topper is the space where all the beads and glitter sit. If it is too shallow, then the decorative elements cannot move around. But if it is too deep, then all of the elements fall to the bottom and won’t be visible. It also needs to be fully sealed to make sure that none of the elements fall out. This is done by working in several layers.
- First there is a backing layer. This needs to be sturdy as it will support the rest of the structure. The backing is often visible through the clear window, so it is best to use nice looking cardstock.
- A raised layer* is then added. This is often called a “dam” and it serves to hold the decorative elements.
- The raised layer is then sealed, usually with something clear like acrylic or acetate, to form the window.
- Finally, embellishments are added to finish off the topper.
*Many tutorials for making shaker cake toppers use chipboard to help create a dam inside which the elements can sit. Chipboard works very well, but it is expensive and difficult to cut if you don’t have the correct tools. You can also use foam tape to create your dam. Foam tape is great for straight lines, but it much harder to use around curved shapes.
For this project I used corrugated card which works brilliantly! It is not expensive and is easy to cut into any shape you need. It can also be layered if you need to create a deeper dam to accommodate bigger beads.
What you need to make a shaker cake topper
Small beads and sequins
Pink cardstock
Teal cardstock
Pink glitter cardstock
Gold foil card/paper
Corrugated cardboard
Sheet of acetate
Clear drying craft glue
Tacky glue
Iridescent glitter
Skewer
For those using a Cricut machine (recommended), you will also need:
Cricut standard grip mat (green)
Fine point blade
Deep point blade (optional)
Shaker cake topper tutorial
First cut out all of the elements required. If you are using a Cricut, you can use the fine point blade for your cutting, although a deep point blade does give a nice clean cut to the corrugated cardboard.
This project is available on Design Space. Click the button below to go right to the project
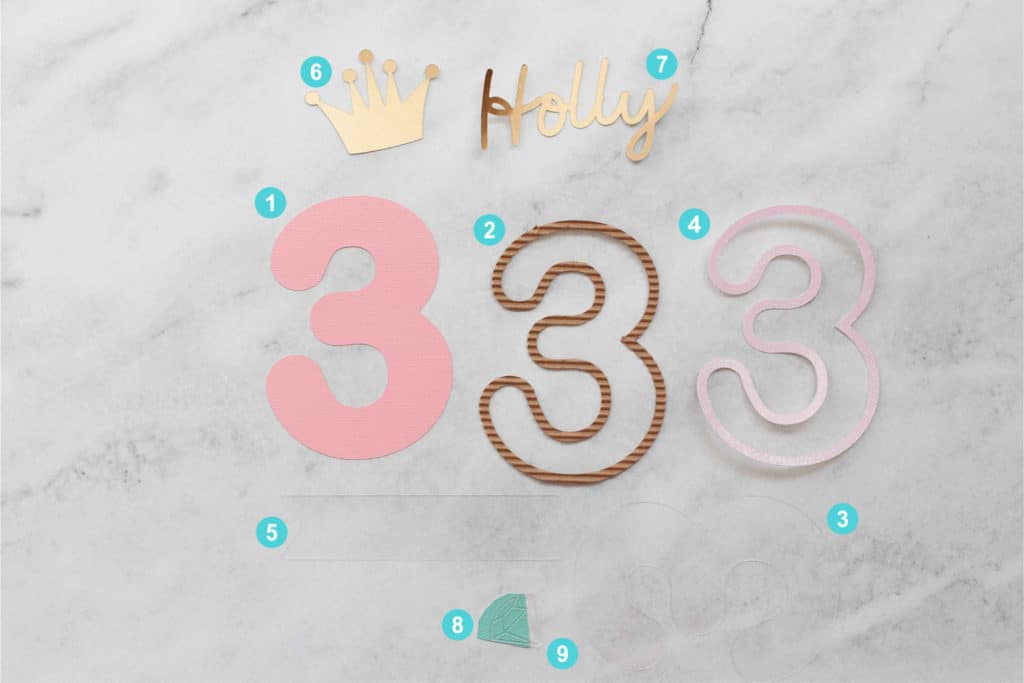
You should have the following:
- Backing cut out of pink cardstock
- Outline cut out of corrugated card
- Number cut out of acetate
- Outline cut out of glitter cardstock
- Banner cut out of acetate
- Gold crown
- Gold name
- Turquoise gem shape
- Gem details cut out of acetate
The order listed above is the order that you will stick your project together. Let’s get started with this shaker cake topper tutorial!

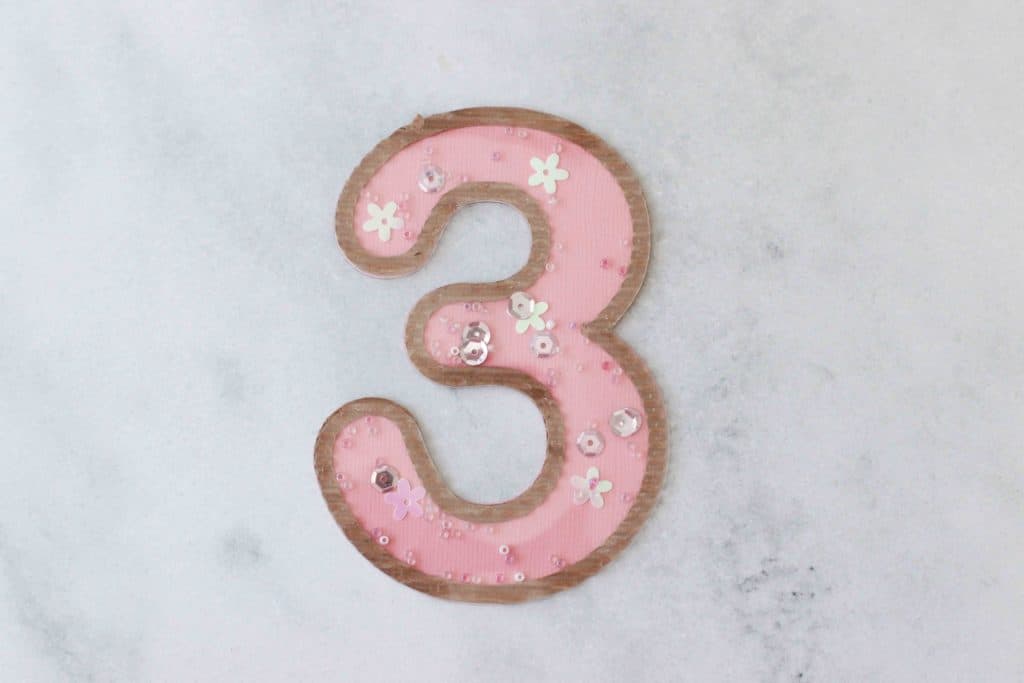
1. First lay down the pink backing. Next, using clear craft glue, neatly stick the corrugated card in place on top of the backing. This creates a “dam” which gives the beads and sequins space to move around, but stops them from falling out.
TIP: Add a few dots of clear tacky glue to the backing so that the beads and sequins have somewhere to “grab onto” and don’t all fall down to the bottom

2. Next stick add the clear acetate layer. Remember to remove the protective film on the acetate before sticking down! Allow this layer to dry completely before continuing.
3. Stick the glitter cardstock outline in place. This will hide the corrugated card and finish off the cake topper nicely.
4. Add the embellishments (the name, gold crown, banner and gem) and allow to dry. Add a dusting of iridescent glitter to the gem for extra sparkle.
5. Stick the skewer onto the back of the topper.
Add your topper to your cake and prepare to impress all your party guests!
